오전일과
시험(화면구현.zip)
vue 시작
-- 1. nodejs 다운로드 및 설치
CMD>node -v
v16.15.1
CMD>npm -v
8.11.0
-- 2. CMD를 열고 vue 프로젝트 생성 프로그램 설치
CMD> npm i vue -g
CMD> npm i @vue/cli -g
-- 3. 설치 확인
CMD> vue --version
-- 4. 프로젝트 생성
CMD> vue create vue_20220629
설치 항목 => Default ([Vue 3] babel, eslint)
[vue 3] 뷰 3버전 설치
-- 5. 프로젝트를 실행하기 위한 폴더 이동
CMD> cd vue_20220629
-- 6. 서버구동
CMD> npm run serve
깃허브에
노드모듈은 안올림
git ignore에 노트 선택하면 모듈 제외 업로드 됨
오후에 노드모듈 집에서도 사용하는 법 알려주심
D:\vue\vue_20220629에서 cmd를 작동시키고
노드모듈 깃허브 패키지(노드모듈 재다운로드)
CMD>npm install
노드모듈 복원
CMD>npm run serve

모듈이 저장되어있는 파일
비주얼스튜디오 코드
작업할때 초기 설정
vue language features
vetur
Vue VSCode Snippets

작업 장소
vue_20220629 > src > components > HelloWorld.vue
single page application이라는 것을 만들어 볼 것.(LoginPage.vue, JoinPage.vue, MainPage.vue)
누를때마다 페이지 로딩x
일부 위치에 있는 애들(컴포넌트)만 변경
=================
기본적인 모듈에는
라우트 설정 x
우리는 라우터 쓸거니까 설정함.
cmd 중지(컨트롤+c) 후 라이브러리 깔고 함
-- 라우트
CMD> npm i vue-router@next --save
-- 벡엔드 연동
CMD> npm i axios --save
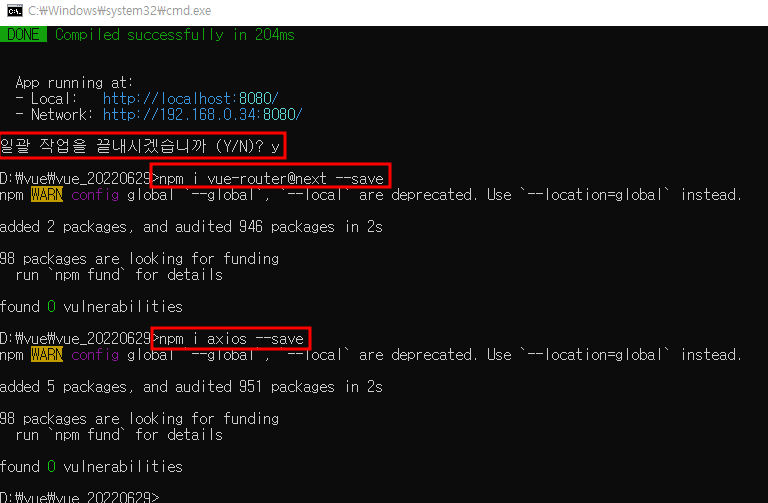
위 라이브러리 다운시 모듈에 들어감
=================
서버 재가동
CMD> npm run serve

서버 구동하기

서버 구동 장면

구동시 화면(App.vue, HelloWorld.vue)
본격적으로 작업 시작
App.vue
index.js (src>routes 폴더 생성)
JoinPage.vue
LoginPage.vue
MainPage.vue
vue.config.js(서버 설정 및 줄인말 쓸려고 할때 설정)
중요
-App.vue(가장 기초가 되는 페이지)

<template>
  <div>
    <router-link to="/"><button>메인</button></router-link>
    <router-link to="/login"><button>로그인</button></router-link>
    <router-link to="/join"><button>회원가입</button></router-link>
    <hr />
    <router-view></router-view>
  </div>
</template>

<script>
export default {
  setup () {


    return {}
  }
}
</script>

<style lang="scss" scoped>

</style>
가장 기초가 되는 페이지로써
single page application이라는 것을 만들어 볼 것.(LoginPage.vue, JoinPage.vue, MainPage.vue)
누를때마다 페이지 로딩x
일부 위치에 있는 애들(컴포넌트)만 변경
버튼을 누를때마다 아래 위치에 있는 애들만 벼녕(컴포넌트 변경)
중요
vue.config.js(서버 설정 및 줄인말 쓸려고 할때 설정)
const { defineConfig } = require('@vue/cli-service')
module.exports = defineConfig({
  transpileDependencies: true,
  devServer : {

    //백엔드의 서버 설정
    //수정하면 서버 재구동 필수
    // const url = "http://1.234.5.158:23000/member101/select.json"
    // const url = 'member101/select.json'
    proxy : {
      '/member101': {
        target : 'http://1.234.5.158:23000',
        changeOrigin : true,
        logLevel : 'debug'
      }
    }
  }
})
-MainPage.vue
<template>
    <div>
        메인 페이지입니다.
    </div>
</template>

<script>
export default {
    setup () {


        return {}
    }
}
</script>

<style lang="css" scoped>

</style>
vbase 단축키를 활용하여 빠르게 메인 작성
특이사항x
-LoginPage.vue
<template>
    <div>
        <div class="container">
            <h3>로그인</h3>
            {{state}}
            <input type="text" v-model="state.userid"/>
            <input type="password" v-model="state.userpw"/>
            <button @click="handleLogin()">로그인</button>
        </div>
    </div>
</template>

<script>
import axios from 'axios';
import { reactive } from '@vue/reactivity'
import { useRouter } from 'vue-router';
export default {
    setup () {
        const router = useRouter();

        //공통으로 쓰는 변수 등록
        const state = reactive({
            userid: '',
            userpw:''
        });

        //함수 등록
        const handleLogin = async() => {
            // alert('로그인 버튼 확인' + state.userid)
            const url = '/member101/select.json';
            const headers = {"Content-Type":"application/json"};
            const body = {
                //백엔드에서 id, pw 만들어놔서 바꾸면 안됨
                id : state.userid,
                pw : state.userpw
            }
            const response = await axios.post(url, body,{headers});
            console.log(response.data);
            if(response.data.status === 200){
                alert('로그인 성공')
                router.push({path:'/'})
            }
        }

        return {state, handleLogin}
    }
}
</script>

<style lang="css" scoped>
.container{
    width: 700px;
    border : 1px solid #cccccc;
    margin : 0 auto;
    padding : 30px;
}
</style>
div태그와 연동된(reactive) 것을 만듬.
{{state}}
{{state.userid}}
{{state.userpw}}
<input type="text" v-model="state.userid"/>
<input type="password" v-model="state.userpw"/>

<script>

import { reactive } from '@vue/reactivity'

export default {
    setup () {
        // {userid:'aaa', userpw:'bbb'};
        const state = reactive(
            {
            userid : 'aaa',
            userpw : 'bbb'
            }
        );
        return {state}
    }
}
</script>
vue에서 백엔드랑 연동하는 방법을 배움
<script>
import axios from 'axios';
import { reactive } from '@vue/reactivity'
import { useRouter } from 'vue-router';
export default {
    setup () {
        const router = useRouter();

        //공통으로 쓰는 변수 등록
        const state = reactive({
            userid: '',
            userpw:''
        });

        //함수 등록
        const handleLogin = async() => {
            // alert('로그인 버튼 확인' + state.userid)
            const url = '/member101/select.json';
            const headers = {"Content-Type":"application/json"};
            const body = {
                //백엔드에서 id, pw 만들어놔서 바꾸면 안됨
                id : state.userid,
                pw : state.userpw
            }
            const response = await axios.post(url, body,{headers});
            console.log(response.data);
            if(response.data.status === 200){
                alert('로그인 성공')
                router.push({path:'/'})
            }
        }

        return {state, handleLogin}
    }
}
</script>
-JoinPage.vue
회원가입 란 만듬
html과 다르게 window.location을 쓰지 않고 router.push를 씀
<template>
    <div>
        <div class="container">
            <h3>회원가입</h3>
            <!-- {{state}} -->
            <br/>
            <label class="lbl">아이디</label><input type="text" v-model="state.userid"/>
            <br/>
            <label class="lbl">암호확인</label><input type="password" v-model="state.userpw"/>
            <br/>
            <label class="lbl">암호확인</label><input type="password" v-model="state.userpw1"/>
            <br/>
            <label class="lbl">이름</label><input type="text" v-model="state.username"/>
            <br/>
            <label class="lbl">이메일</label><input type="text" v-model="state.useremail1"/>
            <label>@</label>
            <select v-model="state.useremail2">
                <option>daum.net</option>
                <option>naver.com</option>
                <option>gamil.com</option>
            </select>
            <br/>
            <label class="lbl">나이</label><input type="number" v-model="state.userage"/>
            <hr/>
            <button @click="handleInsert()">회원가입</button>
        </div>

    </div>
</template>

<script>
import axios from 'axios';
import { reactive } from '@vue/reactivity'
import { useRouter } from 'vue-router';

export default {
    setup () {
        const router = useRouter(); // 회원가입이후 이동할떄 쓰는 것

        // {userid:'aaa', userpw:'bbb'};
        const state = reactive(
            {
            userid : 'coin2',
            userpw : 'rjwl12',
            userpw1 : 'rjwl12',
            username : '기니다',
            useremail1 : 'a',
            useremail2 : 'naver.com', // @생략됨
            userage : 26
            }
        );

        const handleInsert = async() => {
            //유효성 검사 자리
            if(state.userid ===''){
                alert('아이디 입력하세요.')
                return false;
            }


            const url = '/member101/insert.json';
            const headers = {"Content-Type":"application/json"};
            const body = {
                id : state.userid,
                pw : state.userpw,
                name : state.username,
                email1 : state.useremail1 + '@' + state.useremail2,
                age : Number(state.userage)
            }
            const response = await axios.post(url, body,{headers});
            console.log(response.data);
            if(response.data.status === 200){
                alert('회원가입 완료')
                router.push({path:'/login'})
                //index.js를 보면 path나옴
            }
        }
        return {state, handleInsert}
    }
}
</script>

<style lang="css" scoped>
.container{
    width: 700px;
    border : 1px solid #cccccc;
    margin : 0 auto;
    padding : 30px;
}
.lbl { /* 인라인블락으로 가로 조정 가능하게 함 */
    display: inline-block;
    width: 100px;
}
</style>
수업 外
visual studio code
작업환경 폴더 변경


'vue' 카테고리의 다른 글
| 국비 코딩 풀스택 수업 12일차(에어컨 안되는 날) (0) | 2022.07.06 |
|---|---|
| 국비 코딩 풀스택 수업 11일차 (0) | 2022.07.05 |
| 국비 코딩 풀스택 수업 10일차 (0) | 2022.07.04 |
| 국비 코딩 풀스택 수업 9일차 (0) | 2022.07.01 |
| 국비 코딩 풀스택 수업 8일차 (0) | 2022.06.30 |